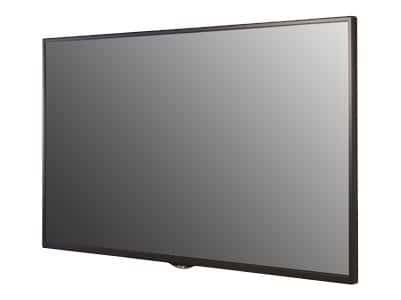
Computer-based detection of defects is replacing manual inspection in a large variety fields, mainly owing to faster times and increased reliability. This is particularly true for inspection of computer hardware and all kinds of devices in high-technology production. One of our clients needed to compare the performance of a new inspection procedure of Flat Panel Displays (FPD) with the results obtained using the existing process. The goal was to demonstrate the correct detection and defect position reported by the new technology.
The first step to inspect the procedure is to put in place a system in charge of image acquisition software and control, via a set of cameras and a collector component which gathers the images and drives them to a frame grabber, which in turn brings together all the images for the analysis phase. The following step is the calibration of each camera with respect to several issues: for its geometric distortions due to lens, tilt and rotation; for its relative position displacement; and for displacement estimations between consecutive images. This enables to compute the total glass motion profile from registration of all cameras.
At this point RSIP Vision integrates its algorithm for defect detection in the cell area, in view of adapting it to the code. Then we make sure to perform a correct and precise identification of the align marks (fiducials), which is essential to build the panel coordinate system. This is done first by identifying the align marks during the passage of the panel under the cameras; this identification must nail the unique pattern of the marks. Of course, the location has to be precise, in order to support the precision level requirements of the other parts of the system. The align marks must be consistent, regardless of the distance between them. Finally, we build the map dynamically, before we proceed to the next step of our Flat Panel Display inspection.
At this stage we connect the registration module to the monitoring software, so that the latter can give feedback for the mechanical performance. This leads to the development of a frame to frame algorithmical registration which is not devoid of challenges: it has to be fast enough to take into account the multitude of cameras capturing frames and the multitude of frames to analyse; it has to take into account the motion of the conveyor belt and the angular deviations due to the camera and the FPD glass position; finally, it has to be ready for future hardware implementation, when the application will turn into a full system.
Our software incorporates the verification of the false alarm level, in order to compare it with the previous system. At the same time it has to deal in a coherent way with a multitude of images and with the displacements data coming from the registration step.
The success of this FPD Inspection project is verified through special panels, designed and produced with intentional defects bearing different levels of severity. These defects range from the hidden ones to the most simple to detect. In this way we are able evaluate the exact capability of our software to identify flaws during its Flat Panel Display inspection and the size of the defects it is able to detect.
Read about other projects in Automated Optical Inspection.

