Most of the world’s steel is manufactured in a process of continuous (stand) casting, a process introduced in the late 1950s. In this highly efficient process, metal is solidified into a semi-finished product, which is subsequently sent to the finishing mills. The semi-finished product is prone to surface defects caused by the casting procedures and needs to be inspected prior to shipment.
Among the most prominent types of damage, longitudinal cracks in semi-finished metal are frequent. Non-contact in-line inspection and detection of cracks are made by computer vision system, primarily composed of grayscale acquisition modality. Manual means of inspection can include ultrasound, magnetic powder and thermocouples. However, these methods are slow, whereas automatic contact-free procedures such as laser scanning can be placed in-line for continuous inspection during production..
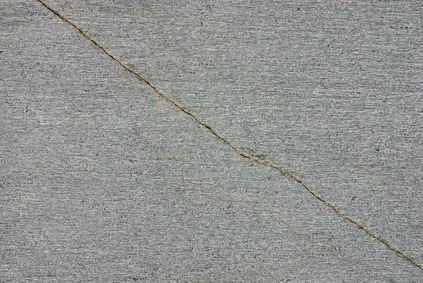
Vision-based inspection systems have to be tuned to reduce the alert of false positive. The specific defect type dictates the method to be used for their detection. For crack detection, a manufacturer might wish to tune the algorithm to detect cracks of specific length, shape and depth. In this case, three-dimensional analysis of the slabs is required to determine crack depth.
The first step in the procedure is the actual detection of the cracks. With greyscale analysis, algorithms based on morphological segmentation are a simple choice used to detect an initial crack region. Characterization of the suspected crack in 3 dimensional is then performed in order to reduce false positives. Segmentation and extraction of the surface shape of the suspected crack allows to discern between true and false positive detection.
To facilitate success of both crack detection (on the algorithm developer’s end) and production line (on the manufacturer’s end), it is important to study the characteristics of surface damages. For this purpose, the three dimensional reconstruction of detected cracks can be studied and their geometric characteristics – such as depth and branching – can be fed to a classifier. The surface information is used to train classifiers by using the relevant information, enabling them to classify cracks of specific origins.
Crack inspection using non-destructive and contact-free methods are widely used in the industry. From small electronic parts to bulky wood, ceramics and wool, vision-based inspection is cost effective, with high reproducibility and reliability. No single algorithm can operate in all scenario, therefore it is imperative to adjust the inspection algorithm to the nature of production. RSIP Vision has both the skills and the experience to construct in-line and off-line inspection algorithms for all kind of production lines and tasks.
Crack inspection using non-destructive and contact-free methods are widely used in the industry. From small electronic parts to bulky wood, ceramics and wool, vision-based inspection is cost effective, with high reproducibility and reliability. No single algorithm can operate in all scenario, therefore it is imperative to adjust the inspection algorithm to the nature of production. RSIP Vision has both the skills and the experience to construct in-line and off-line inspection algorithms for all kind of production lines and tasks.

